Two Weeks with a PowerBook
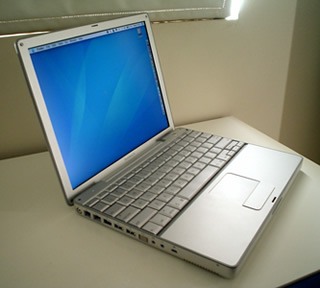
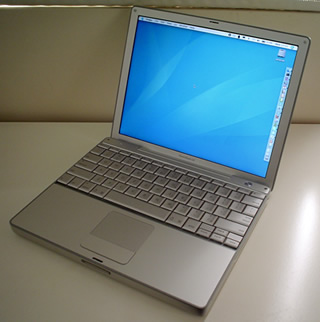
I have now had my PowerBook for a little more than two weeks. Like I said in my previous post, I am very impressed with the design and build quality of the machine. First, the obligatory photos.

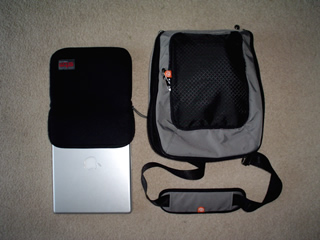
I bought an STM glove and a booq Mamba XS laptop bag to carry the notebook around. If you own a 12″ PowerBook, you should make sure that the glove is actually made for the PowerBook. Don’t buy the gloves that say they fit both the 12″ iBooks and PowerBooks. The PowerBook is smaller than the iBook and these gloves won’t fit nicely.
Everything is outstanding, except for the screen quality, which is pretty average. I usually plug in an external monitor when at work and at home. On the move, the 12” lcd is adequate. The 12” PowerBook shares the same screen as the 12” iBook. The other PowerBooks have better quality screens. The MacBook Pro apparently has Cinema Display quality screen. I knew all this before I bought the notebook, but I was not willing to carry a bigger laptop around. Here’s to hoping for a better screen on the 13.3” (or whatever it ends up being) MacBook Pro. The arrow keys are also too small and it takes a while to get used to them. If you look closely at the following photo, you will notice that the arrow keys are half-height so that they are flush with the lower end of the keyboard.
There are a few things that I had to get used to:
- To go to the end of a line, you need to press command+right arrow key. Likewise, to go to the beginning of a line, you need command+left.
- The delete key is basically backspace. To delete to the right, you need fn+delete.
For my usage pattern, the 512MB of RAM that the notebook ships with is the bare minimum to run OS X comfortably. I have since upgraded the memory to 1.25GB and things really fly now. The UI in general feels a little slower than Windows XP and KDE, but faster than Gnome. Purely subjective, of course. Windows XP would be more bearable on a machine with 256MB of RAM than OS X. However, throw more RAM at OS X, and it seems to make better use of the extra memory. Once you start having lots of applications running, OS X doesn’t seem affected whereas the hard disk starts trashing in Windows. Anand Shimpi attributes this to the more aggressive caching in OS X.
Window management is completely different in OS X. There is no taskbar, and any attempt to use the dock as your window management tool is likely to slow you down and lead to frustration. Instead, you should manage windows spatially. Get over the fact that any application that you are not using should be minimised, and get over the fact that you should maximise the application that you are currently using. Let the screen(s) clutter up, and use exposé to find the window that you need. With the higher resolution displays it makes more sense to adopt this approach anyway. You can also alt-tab you way through the windows. However, unlike in Windows, you can use your mouse to select the relevant application while doing that. Another way to manage your windows is to close (command+w) any application window that you don’t immediately need. Closing a window will not quit the application. Some applications I never quit – they just remain closed out of sight if I am not using them: the terminal, safari, mail.app, iTunes and IM clients. I will still be alerted if an email or an IM message comes in. And accessing them again is instantaneous since they are still running in the background.
Shortcuts are also plentiful and are the recommended path to nirvana. Some shortcuts that are used in Windows, KDE and Gnome have equivalents in OS X. Except that you use the command key instead of ctrl. Command-c copies, command-v pastes, command-q quits, etc.
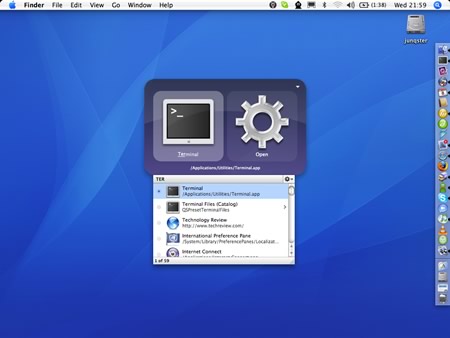
Command+space will bring up spotlight. Spotlight is basically instantaneous, system-wide search. It’s so fast because it indexes meta data every time you create, save, move, copy or delete a file. Spotlight can search through your applications, system preferences, as well as documents, emails, IM messages, etc. You can use it to quickly launch applications without having to touch your mouse. Hit command+space, type in “ter” and spotlight instantaneously finds the terminal app. Just arrow down and hit enter. Quicksilver is also a nice application launcher. I have bound option+space to bring up Quicksilver and I have it configured to search for applications first. I use Spotlight as the general search tool and Quicksilver as my application launcher. The following screenshot shows Quicksilver in action.
If you come from a *nix background and want a pager, Desktop Manager is a nice, free pager. The transitions while switching desktops are cool too.
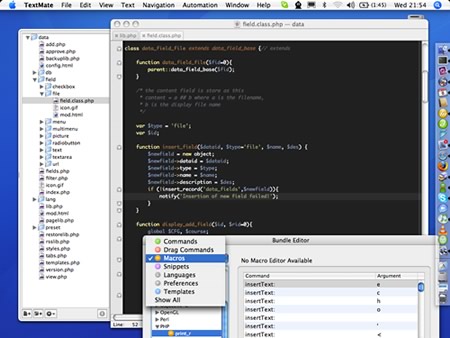
My new editor of choice is TextMate. I still had 17 days remaining out of the 30 day trial when I decided to buy the license. I love the fact that it can be launched from the terminal. I don’t use the finder while coding these days. The terminal is faster and I can also use grep & co. to boot. TextMate has a minimalistic UI and does not get in the way. You won’t find tons of menus/toolbars. As you grow into the editor, you learn the shortcuts and start using macros. Think vim with a modern GUI that has code folding, tabs and project directory browsing. I won’t get into too much details. Raving about TextMate is a bit like raving about Ruby on Rails. It’s all over the web. Okay, maybe I’m exaggerating, but I’m sure that this would be true if TextMate was also available for Windows and *nix. Here’s a screen grab of TextMate:
If you are a long-time Windows user and you miss having the start menu to launch applications, just add your Applications folder to your dock. You will then be able to right-click (or ctrl+left-click, or left-click and hold) on its icon to get a menu with all your applications. This will also enable you to keep only the most used applications in your dock to keep things tidy. You can add any folder to your dock by dragging it between the trash can and the dark line that separates the trash from the rest of the dock icons.
I don’t consider myself as an OS X power user yet. Feel free to drop me a line if you have any tips or any suggestions for killer apps :-)